
Ciasto na Pierogi
Basic Pierogi Dough (Vegan, Egg-free)
How to pronounce it?
chia-stoh na pierre-oghee
‘Play’ to hear:

The secret of pierogi and their unique taste lies in…. the dough!
This traditional pierogi dough is the simplest one, made of flour and water. It’s elastic, pliable, soft and easy to work with. You can roll out this dough very thinly, and it won’t break when folding. The recipe has no eggs, making it suitable for vegans.
For the full list of ingredients & detailed instructions, please see the recipe card at the end of this post. But before you scroll, there’s important stuff to know below.
Even the most sophisticated filling won’t save our dumplings if the dough is too tough or floury. But with these tips and the recipe below, you’ll get it right every time.
If you’re looking to learn more about Polish dumplings, have a look here:
Do you need any special ingredients to make this Traditional Pierogi Dough?
No. All you need is flour, hot water and a pinch of salt.
🇵🇱 In Poland, the best flour type for this job is ‘500’, also known as ‘poznańska” (of Poznań) or “wrocławska” (of Wrocław).
🌍 Internationally, all-purpose flour works well. It can be mixed (half-and-half) with pastry flour. Remember: not all flours are created equal – if the results are not satisfying, don’t get discouraged. Try the recipe again with a different flour brand/mill.
What dishes can you make with this Eggless Pierogi Dough?
As the name of the recipe suggests, this dough is excellent for pierogi wrappers. Any filling works – both savoury (meat, veggies, grains) and sweet (fruit and sweetened farmer’s cheese).
This dough is great for Uszka dumplings (filled with mushrooms and/or sauerkraut, served in Red Barszcz).
Can you make this Pierogi Dough another way?
This recipe works well the way it is, but here are some options:
- Some cooks replace water with milk, either fully or partially. That’s worth trying, especially when making pierogi with sweet fillings.
- Some recipes include whole eggs or just egg yolks, just like for an Italian pasta. Eggs make the dough tougher, therefore it’s more difficult to handle.
If you would like to try a different recipe, have a look at Pierogi Dough with Sour Cream or Gluten-free Pierogi Dough based on buckwheat and potato flour.
What diets is this Classic Pierogi Dough suitable for?
This Pierogi Dough recipe is suitable for: vegans, vegetarians, and those who follow dairy-free and/or egg-free diets.
If you’re avoiding grains, try this Gluten-free Pierogi Dough recipe.
How long can you keep this Pierogi Dough in the fridge?
You can keep any leftover Pierogi Dough in the fridge for up to 2 days, wrapped in cling film. But if you’re not planning to use it soon, it’s better to freeze it instead.
Can I freeze this Pierogi Dough?
Yes. Wrap the dough ball into cling film and label it well (with the description and today’s date). Consume within 3 months. To defreeze, leave in the fridge overnight to thaw.
It’s a good method to save any leftovers from going to waste. I wouldn’t recommend making the dough with the sole intention of freezing it – it’s better to freeze pierogi with filling, already assembled and blanched.
FAQ and Troubleshooting
🤔 How to make Pierogi Dough with KitchenAid?
Just follow the recipe outlined below, it’s the same regardless of the equipment used.
There are two ways you can take advantage of your mixer:
- Instead of kneading the dough by hand, you can use the machine. Simply drop in 4 cups (500 g) of flour, half a cup (125 ml) of hot water and a solid pinch of salt. Using the dough hook, knead the dough for 10 minutes.
- If you own a pasta roller attachment, you can use it to roll out the dough (instead of a traditional rolling pin). Cut the dough into sections that would fit into your pasta roller. Start with a wider setting and gradually increase it until you reach the thinnest option. Once done, place the dough sheet onto your workspace and cut out round discs, as per the recipe below.
🤔 Pierogi Dough is too sticky!
You can do two things here:
- First – add more flour to the dough and knead it in.
- Second – grease your hands with neutral cooking oil when handling the dough. Perhaps that’s counter-intuitive, but it works!
🤔 Pierogi Dough is too tough!
That could be caused by many things:
- There’s too much flour and not enough liquid.
Unfortunately, it’s hard to add more liquid once the dough is formed already. That’s why it is crucial to observe the process – as we blend the flour with water – and act accordingly. You could add some sour cream and knead it in, this should be easier to do than handling water. - The water was too cold, and the gluten didn’t get a chance to develop properly.
- The dough needed more love – meaning: kneading time.
- Have you added an egg or an egg yolk? If so, that could be a reason. Try without it next time.
Traditional Pierogi Dough (Vegan Friendly, No Eggs)
This traditional pierogi dough is the simplest one, made of flour and water. It’s elastic, pliable, soft and easy to work with. You can roll out this dough very thinly, and it won’t break when folding. The recipe has no eggs, making it suitable for vegans.
Ingredients
- 4 cups (500 g) all purpose flour
- 1 cup (8.45 fl oz, 250 ml) hot water
- 1 tsp salt
Instructions
By hand:
- Sift four cups of flour onto your work surface. Make a well and pour in a little bit of hot water. Mix everything together using your hands, aiming to evenly moisten the flour as you go.
- Gradually add more water and continue blending it with the flour.
- Observe the forming dough and allow it to “drink” as much water as it requires. You’ll know it has enough liquid, once the dough doesn’t stick to your hands anymore.
- Continue kneading until the dough is soft, elastic and there aren’t any lumps. It can take a while, so don’t get discouraged.
Or - using a stand mixer:
- Attach a dough hook. Place four cups of flour in the work bowl.
- With the machine running, gradually add hot water, up to half a cup.
- Once you’re done, stop the mixer. Poke the dough a bit with your fingers. Ideally, the dough should be soft, but still hold its shape when pinched. If it feels too loose - add a tablespoon of flour. If it feels too tough, add some water (a teaspoon at the time).
- Run the mixer for 5 minutes. After that time the dough should be soft, elastic and it shouldn’t stick to your hands.
Finishing up (both methods):
- To let the gluten develop, cover the dough ball for 15-30 minutes and keep at room temperature. You can use a cloth or a warmed bowl placed upside-down.
- Once rested, divide the dough into workable chunks (I quartered it, but that’s up to you).
- Dust your working surface with flour. Roll out a chunk of dough, as thinly as you can.
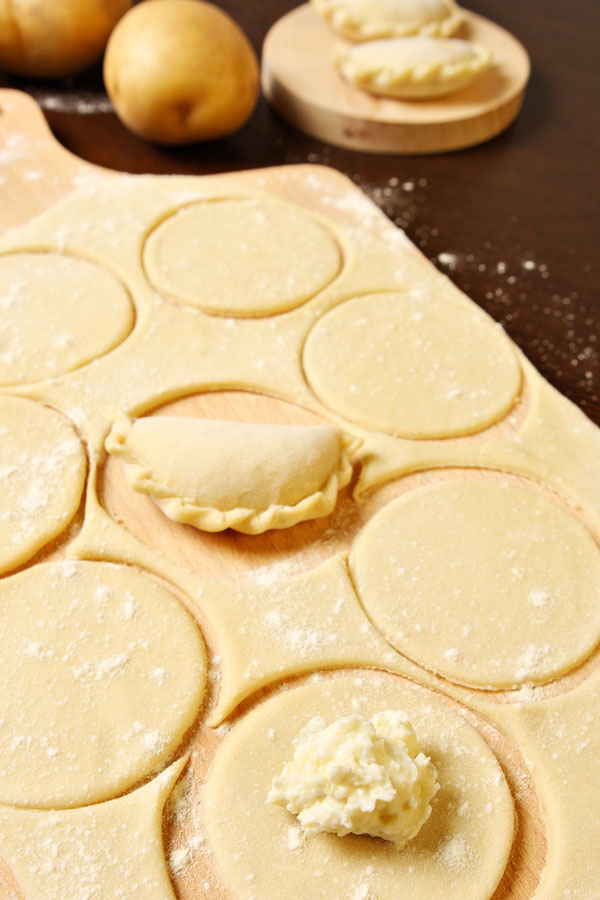
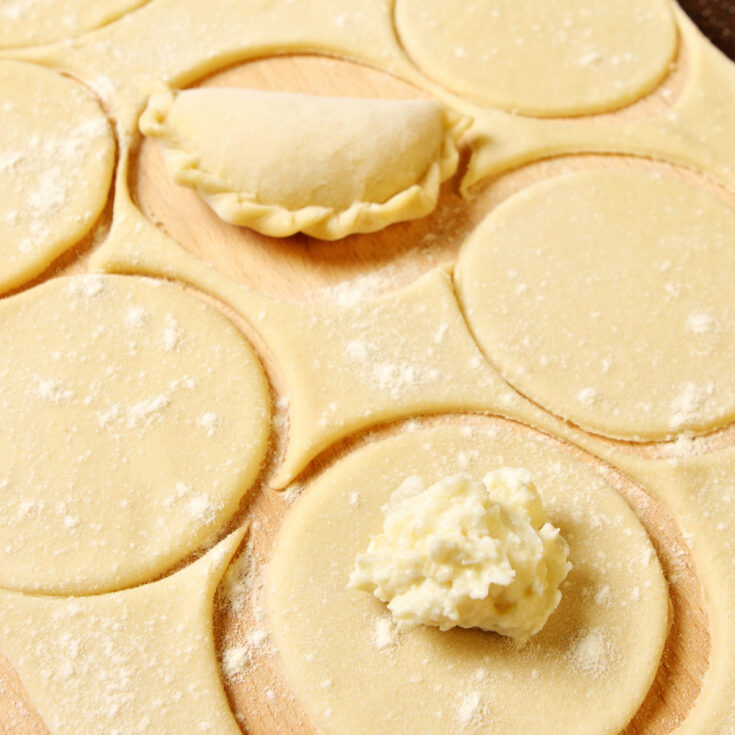
- Cut out circles, roughly 3 inches (7.5-8 cm) in diameter. You can use a round cookie cutter, or a glass rim.
- Place a tablespoon of your chosen filling in the middle of each pastry round. Fold the edges together, creating a semi-circular dumpling. Press the edges firmly. Continue, until you’re out of dough and the filling.
- Once all pierogi are assembled, boil a large pot of water. Drop in a few pierogi at the time, waiting for them to float. Once they do, cook for another minute. Then remove them with a slotted spoon.
- Serve immediately with melted butter or another topping of your choice. Alternatively, melt a tablespoon of butter on a frying pan and fry pierogi on both sides until golden. If you would like to learn more, have a look at this post on how to cook pierogi.
Nutrition Information:
Yield:
10Serving Size:
1Amount Per Serving: Calories: 182Total Fat: 0gSaturated Fat: 0gTrans Fat: 0gUnsaturated Fat: 0gCholesterol: 0mgSodium: 234mgCarbohydrates: 38gFiber: 1gSugar: 0gProtein: 5g
Polonist is reader-supported. When you buy through links on our site, we may earn a small affiliate commission. Learn more
Recipe Information
Filed under:
Alternative traditional/regional names:
Also known / Misspelt internationally as:
Tested by:
First published on:
Recipe by / Adapted from:
Story by:
Bibliography / References: